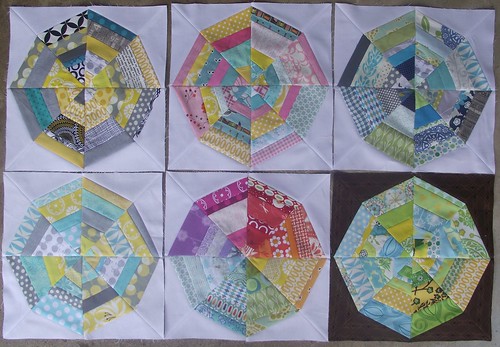
The end of another quarter is fast approaching in the 4x5 modern quilt bee. I'm a hive caretaker once again, and this time I got to be in the first dedicated paper foundation piecing hive. Since I've been on a spiderweb quilt frenzy lately, these blocks only seemed natural for me to make. I love the crisp look of these blocks. I hope the rest of the girls love them as much as I do.
Pattern from Quilter's Cache.
Tuesday, March 20, 2012
Monday, March 19, 2012
Swaps Completed
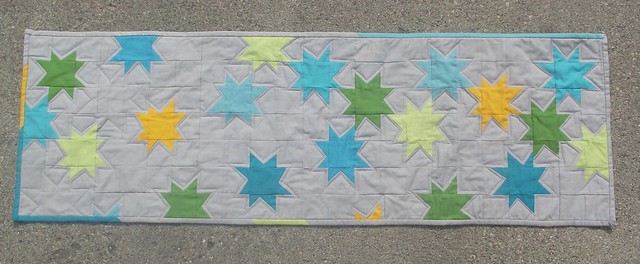
I've been a swappin' fool recently. There have been so many great ones I just couldn't resist. First up is the fabulous For the Love of Solids swap. I had a blast working with all solids in the first round and I just had to jump on board for the second round too. My partner was Beachgirl Sews. I knew almost right away what I was going to make her. This is the table runner I sent her. I'm happy to report that she loved it! :)
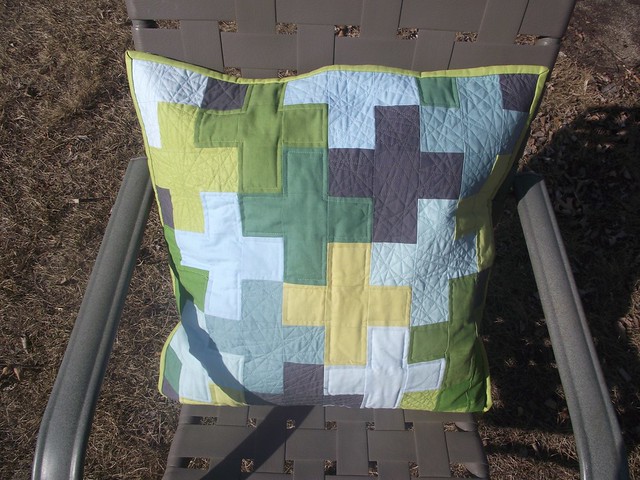
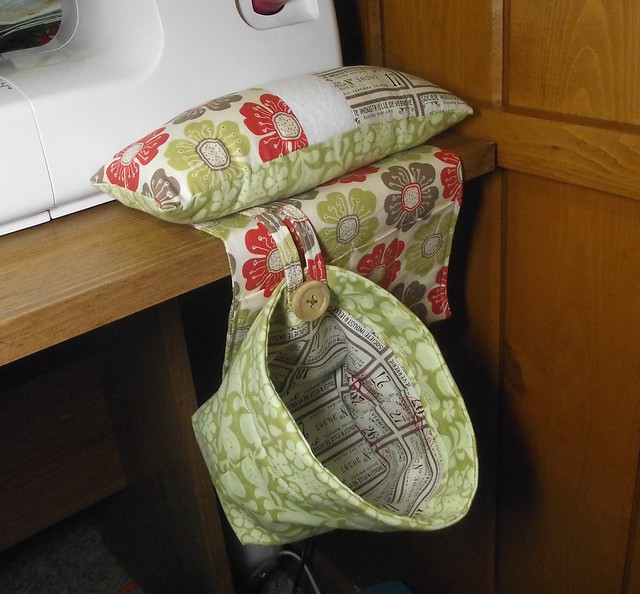
This is the fabulous pillow cover I received from Bijoux Baby. That dense quilting is amazing! I love it so much, and was thrilled to have this show up in my mailbox.
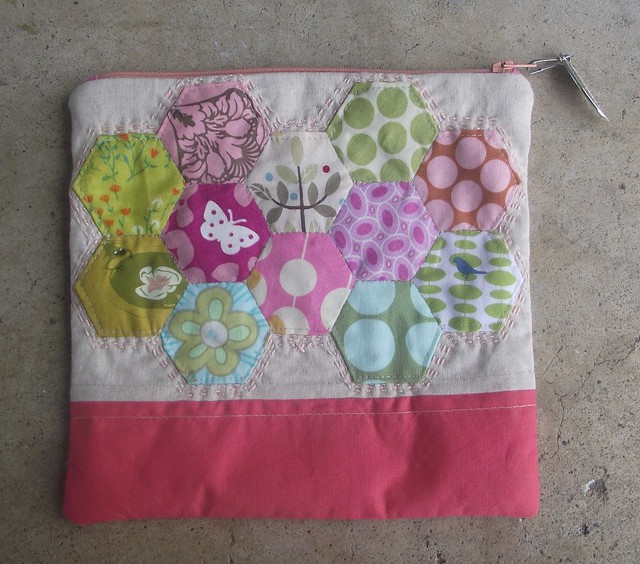
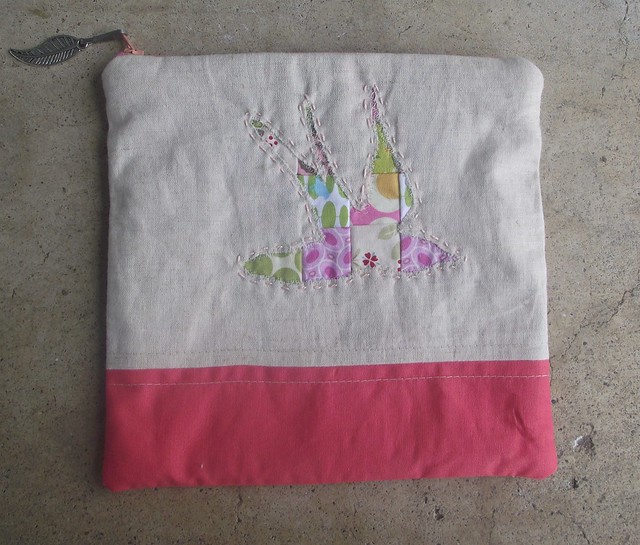
Next up is Mouthy Stitches where we made zip pouches & filled them with scraps. I made this hexie pouch for Hannah.

This is the fabulous pillow cover I received from Bijoux Baby. That dense quilting is amazing! I love it so much, and was thrilled to have this show up in my mailbox.
Next up is Mouthy Stitches where we made zip pouches & filled them with scraps. I made this hexie pouch for Hannah.
I received a gorgeous pouch from Vikki. I love the hexies & the birdie on the back is adorable.
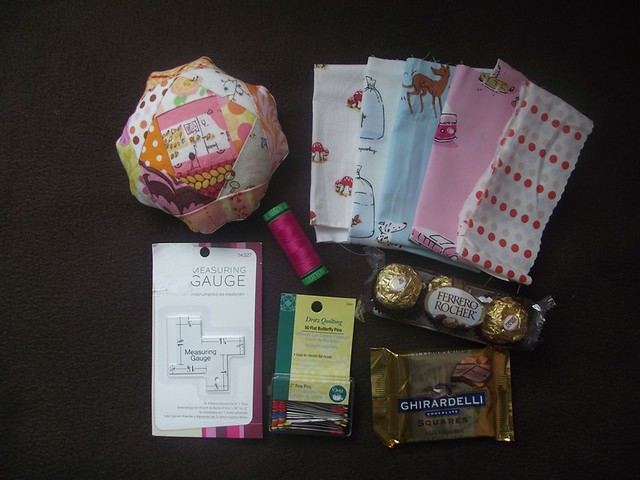
Finally, we have the super fun Bee a {modern} Swapper. Last month was a pincushion swap. I made this weighted pincushion with removable thread catcher for providence jd.
Kim sent me this cute pinnie and goodies. I absolutely adore it all, and was beyond thrilled to receive this fabulous package.
Table Top Swap
Amy is hosting a fabulous new swap on flickr: Table Talk Swap. This round we will be swapping sets of 4 cloth napkins. Sign ups are still open until 3/22. If you love to sew for others and receive something gorgeous that another talented sewist made just for you, then head on over!
Here's my inspiration mosaic for the swap. Look at all those lovely table linens. So much fabulousness! And how great would those fabric stacks in the bottom row looks as pretty napkins?
 |
| 1. <a href="http://www.flickr.com/photos/27953607@N05/4032491240/in/faves-melissablom/">patchwork napkins</a>, 2. <a href="http://www.flickr.com/photos/sewfantastic/4595744111/in/faves-melissablom/">{ Urban } HOME Goods - a modern swap </a>, 3. <a href="http://www.flickr.com/photos/mamaroux/5506404745/in/faves-melissablom/">Innocent Crush, Guest Towels / Cloth Napkins</a>, 4. <a href="http://www.flickr.com/photos/28099352@N02/4168365235/in/faves-melissablom/">Orange Crush Bistro Set</a>, 5. <a href="http://www.flickr.com/photos/thelinenlavoir/4671839820/in/faves-melissablom/">Blue White Linen Vintage Guest Towel</a>, 6. <a href="http://www.flickr.com/photos/maggiemakes/3916791879/in/faves-melissablom/">napkins</a>, 7. <a href="http://www.flickr.com/photos/33878281@N07/4792013310/in/faves-melissablom/">napkins</a>, 8. <a href="http://www.flickr.com/photos/7332275@N06/6156434172/in/faves-melissablom/">artichoke napkin set of 8</a>, 9. <a href="http://www.flickr.com/photos/27953607@N05/5468508892/in/faves-melissablom/">napkins for kate</a>, 10. <a href="http://www.flickr.com/photos/33761137@N00/3448127679/in/faves-melissablom/">Easy Mother's Day Gift</a>, 11. <a href="http://www.flickr.com/photos/juliefrick/4296582958/in/faves-melissablom/">Hello, Napkins!</a>, 12. <a href="http://www.flickr.com/photos/50590626@N04/5568129146/in/faves-melissablom/">Farmdale Napkins</a>, 13. <a href="http://www.flickr.com/photos/27953607@N05/5276904005/in/faves-melissablom/">linen napkins</a>, 14. <a href="http://www.flickr.com/photos/32121000@N07/5606712031/in/faves-melissablom/">Daisy Chain Napkins</a>, 15. <a href="http://www.flickr.com/photos/sewingdaisies/5731401207/in/faves-melissablom/">Crochet: Sweet Nothings Napkins</a>, 16. <a href="http://www.flickr.com/photos/28099352@N02/4317442584/">Denim Blue and Kelly Green Bistro Napkin Set</a>, 17. <a href="http://www.flickr.com/photos/27953607@N05/4150545840/">hope valley fabric stack</a>, 18. <a href="http://www.flickr.com/photos/jenib/6837288708/in/pool-1529688@N21">Happy Mail</a>, 19. <a href="http://www.flickr.com/photos/27953607@N05/5558810402/">pure elements</a>, 20. <a href="http://www.flickr.com/photos/erins/6941716459/in/pool-1529688@N21">Yup, they're super pretty in person too. #fabric</a> |
Thursday, January 19, 2012
Planes - a paper piecing tutorial
The Modern Paper Pieced Plane Bee is just getting underway. We're all making the same airplane blocks using the Lone Eagle Block. This has been on my to-do list for a long time, and this bee gave me the kick in the pants I needed. My little man loves these planes, and it's a good thing too, since this is going to be his birthday present from me. Shh! Don't tell!
Since some of the girls are new to paper piecing, I thought I'd be nice and make up a tutorial. I cut my fabrics to minimize waste while allowing a little bit of wiggle room. I hope this helps you ladies!
Step 1: Print out pattern Lone Eagle Block at 100%
Step 2: Trim pattern to 1/8" away from seam allowance.
Step 3:

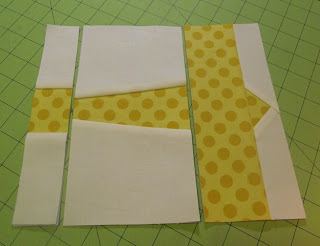
From background fabric cut:
2 - 5"x5" squares
2 - 2" x 5" rectangles
2 - 2" x 4" rectangles
From print fabric cut:
1 - 3" x 5" rectangle
1 - 3" x 9" rectangle
2 - 3" x 2" rectangles
Step 4: Fold pattern pieces at sew lines. This will make trimming the seam allowances easier during construction.
Step 5:

Place the 3" x 5" print rectangle (piece #1) wrong side towards the back of the pattern.
Pin in place.

Be sure fabric covers 1/4" seam allowances past all sew lines. This is where the folding comes in handy!
Step 6:


Place a 5" x 5" background square (piece #2) slightly under the print fabric you just pinned in place.
Trim to a 1/4" seam allowance. This gives you straight lines to line up. As an added bonus, your 2nd piece is now the correct shape, eliminating guess work as to how to place correctly to ensure all your seam allowances will be covered.
Step 7:

Using a short (1 mm) stitch length, begin sewing 1/4 " away from the drawn sewing line, and end 1/4" past the drawn line. Back stitch at the beginning and end of your sewn line.
The paper will rip off easily with the short stitch length, and back stitching ensures that you won't pull your stitches when removing the paper.

This photo shows where I started and stopped my stitching. As you can see, I extended my stitches to the edge of the paper.
Step 8: Turn over and press towards piece #2.
Repeat steps 6 - 8 for piece #3, pressing towards piece #3.
Step 9:

It's now time to trim your completed block section. I pin the short edges to prevent the fabric from sliding during cutting. Trim on the 1/4" seam allowance included in the foundation.

Remove pins and admire your handiwork!
The nose piece of the plane is a little bit trickier, but the steps are still the same. Pin your piece #1 (2" x 3" rectangle) in place, ensuring your seam allowances are covered completely.

Trim pieces #1 & #2 (2" x 5" rectangle) the same way you did for the previous section.
Align edges you just cut & pin in place.


Turn over & sew on line between #1 & #2, starting and stopping 1/4 " past line. Remember to back stitch!
Flip over & press towards piece #2.
Repeat for piece #3.


Trim seam allowance to 1/4".
Align straight edge of piece #4 (3" x 9" rectangle) with edge you just trimmed.
Sew together.
Flip over & press towards piece you just sewed on.

Trim on 1/4" seam allowance included on foundation.
Repeat for tail section. Be sure & pin the edges when you trim your completed section to prevent the fabric from slipping.
It's a horrible feeling to complete a piece, then have to do it over because of an error during trimming. Trust me, I know!
Remove paper backing & give all your completed sections a good pressing.
Some people choose to leave the paper on when they sew the sections together, but I find it to be more of a hassle than anything. The paper tends to slide, and it's more difficult to remove.

Sew sections together using a 1/4" seam allowance. Press, and you've now completed your block!!!!
I do hope this tutorial helps! It was my first, and I hope this is easy to understand. :)
Since some of the girls are new to paper piecing, I thought I'd be nice and make up a tutorial. I cut my fabrics to minimize waste while allowing a little bit of wiggle room. I hope this helps you ladies!
Step 1: Print out pattern Lone Eagle Block at 100%
Step 2: Trim pattern to 1/8" away from seam allowance.
Step 3:

From background fabric cut:
2 - 5"x5" squares
2 - 2" x 5" rectangles
2 - 2" x 4" rectangles
From print fabric cut:
1 - 3" x 5" rectangle
1 - 3" x 9" rectangle
2 - 3" x 2" rectangles
Step 4: Fold pattern pieces at sew lines. This will make trimming the seam allowances easier during construction.
Step 5:

Place the 3" x 5" print rectangle (piece #1) wrong side towards the back of the pattern.
Pin in place.

Be sure fabric covers 1/4" seam allowances past all sew lines. This is where the folding comes in handy!
Step 6:


Place a 5" x 5" background square (piece #2) slightly under the print fabric you just pinned in place.
Trim to a 1/4" seam allowance. This gives you straight lines to line up. As an added bonus, your 2nd piece is now the correct shape, eliminating guess work as to how to place correctly to ensure all your seam allowances will be covered.
Step 7:

Using a short (1 mm) stitch length, begin sewing 1/4 " away from the drawn sewing line, and end 1/4" past the drawn line. Back stitch at the beginning and end of your sewn line.
The paper will rip off easily with the short stitch length, and back stitching ensures that you won't pull your stitches when removing the paper.

This photo shows where I started and stopped my stitching. As you can see, I extended my stitches to the edge of the paper.
Step 8: Turn over and press towards piece #2.
Repeat steps 6 - 8 for piece #3, pressing towards piece #3.
Step 9:

It's now time to trim your completed block section. I pin the short edges to prevent the fabric from sliding during cutting. Trim on the 1/4" seam allowance included in the foundation.

Remove pins and admire your handiwork!
The nose piece of the plane is a little bit trickier, but the steps are still the same. Pin your piece #1 (2" x 3" rectangle) in place, ensuring your seam allowances are covered completely.

Trim pieces #1 & #2 (2" x 5" rectangle) the same way you did for the previous section.
Align edges you just cut & pin in place.


Turn over & sew on line between #1 & #2, starting and stopping 1/4 " past line. Remember to back stitch!
Flip over & press towards piece #2.
Repeat for piece #3.


Trim seam allowance to 1/4".
Align straight edge of piece #4 (3" x 9" rectangle) with edge you just trimmed.
Sew together.
Flip over & press towards piece you just sewed on.

Trim on 1/4" seam allowance included on foundation.
Repeat for tail section. Be sure & pin the edges when you trim your completed section to prevent the fabric from slipping.
It's a horrible feeling to complete a piece, then have to do it over because of an error during trimming. Trust me, I know!

Remove paper backing & give all your completed sections a good pressing.
Some people choose to leave the paper on when they sew the sections together, but I find it to be more of a hassle than anything. The paper tends to slide, and it's more difficult to remove.

Sew sections together using a 1/4" seam allowance. Press, and you've now completed your block!!!!
I do hope this tutorial helps! It was my first, and I hope this is easy to understand. :)
Tuesday, January 17, 2012
Swoon anyone?
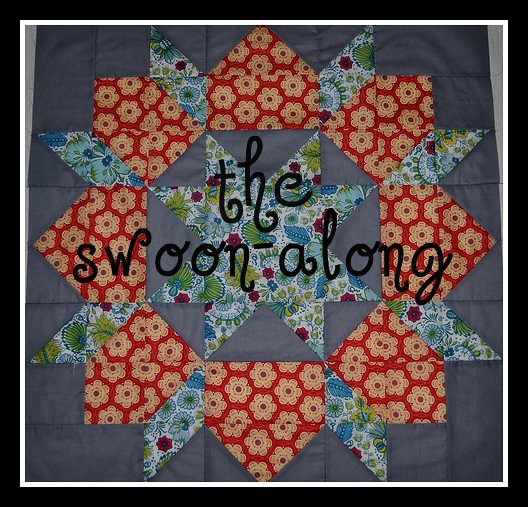
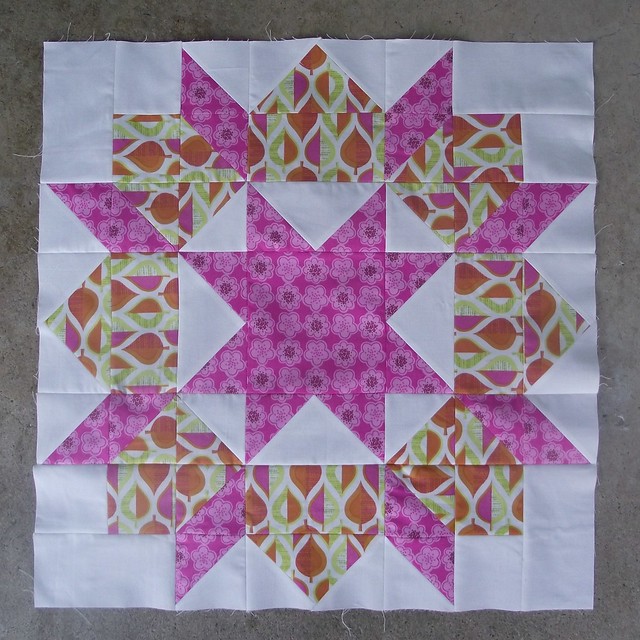
I pulled some fun bright fabrics from my stash. The bright colors just make me smile! :)
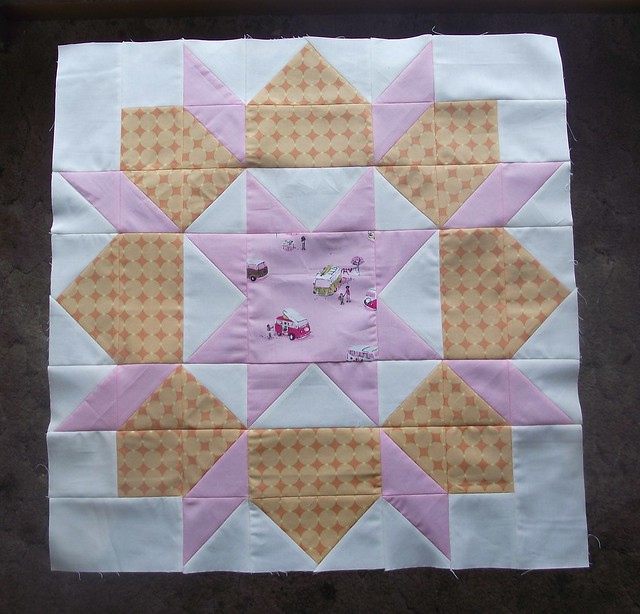
I've completed 3 blocks so far, and I can't wait to make more!

Thursday, January 5, 2012

Hello Neighbor!

Subscribe to:
Posts (Atom)